- August 22, 2019
- WSM
- 0 Comments
- 655 Views
- 2 Likes
- Apex, Aura Component, Development
Lightning Component(Aura) To Display Contacts Related To Particular Account
– Add Controller name in the Component
– Create attributes(Variables) of ID and Contact List so that we can fetch the records from the controller to the Component.
– Create any variable from where can call our method written in apex class and retrieve the data.
– In Our example, we have created a variable ConList where we are calling the method “getRelatedList(Id recordId)” which we have created in our class earlier in 1st step.
– In Lightning component, the syntax for calling method is “c.methodname” in our case it will be “c.getRelatedList”.
– Now We have to pass the parameter of ID (Account ID) so that it will query our data. Using the same variable Conlist we will add a parameter to the method. “.setParams()” is the method for setting parameter. In our example it will be “Conlist.setParams()”.
– After setting parameter we have to set data in component attributes we created earlier in Step 2. “.setCallback()” method will return our data from query and using component.set(“v.attributename” , data.getReturnValue()) we will set the values in the component. In our example it will be – component.set(“v.ContactList” , data.getReturnValue()).
– We have to use “aura:handler” to call an action function from our JS.
– Click on Account Tab
– Open any account which has related contacts.
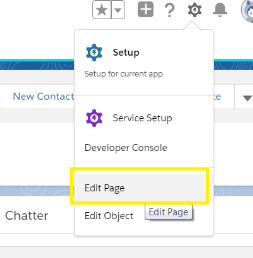
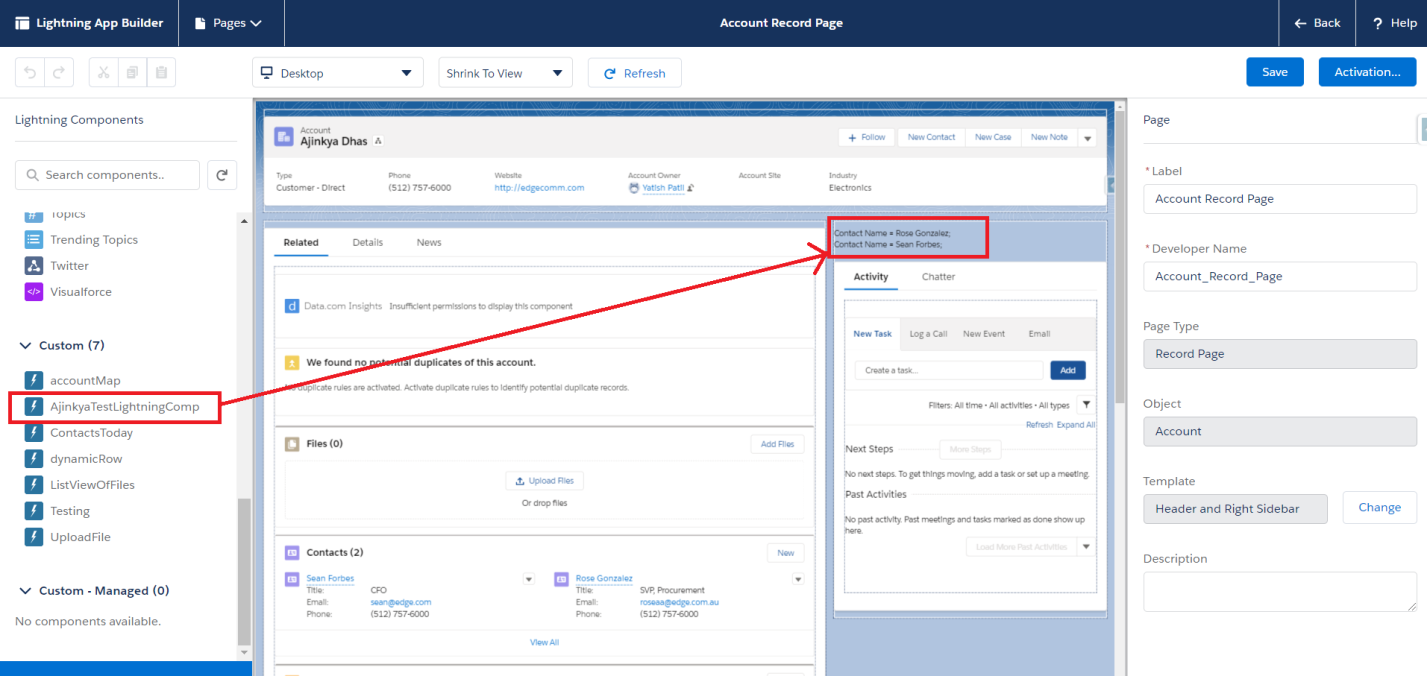
– Click on Setup button Edit Page.


Save the Page. If a pop up appears to assign as org default then click on Assign as Org Default button. If a pop up doesn’t appear your component is saved.

You can add any designs (CSS) of your choices. Explore the salesforce lightning design system (SLDS )library.

scenario where there are no contacts in account what will happen ?
Let’s have a look into it. Create a new account with no contacts in it or else open any existing account with no contacts.

– As we can see in the above picture there are no contacts still we have a view of table headers.(“FIRSTNAME”, “LASTNAME”). Or Sometimes in some of the components may cause a component crash and will throw an error message if no data is retrieved.
– Let’s handle this by adding Aura if-else. (You can refer EPISODE 9 if you are unaware of using it.)
– Let’s use our decorated component for this.
– We just need to add : <aura:if isTrue=”Our Condition”> before our table starts.
After adding our condition, code will look something like this :
Output for above code (If there are no contacts):

– We have handled the scenario where there are no related Contacts in Account.
– Let’s Take this Component to little advance level.
– Firstly let’s replace our normal HTML table to lightning DataTable.
– Delete our previous table.
– Create a new attribute of list type to store the column values. (Column values are mandatory for lightning datatable, we will discuss it as we go ahead with component).
– In the above code snippet we have removed our old table and just added a new attribute “columns” of type “list”.
– Now add column values from our JS(which was created by us earlier).
its values in a list “column”.
Making above changes Our output will remain the same as before(Same as HTML table we created earlier) but now we have access to more functionalities of the lightning data table.
How about changing or editing random fields from the same page. Let’s do it.


We can just change in the values in UI (Box) but we now need to update these values from our controller so that changes can be saved directly on the same page. Correct ?
– Quickly Create a new attribute in our component to add updated values.
– Now we have to create a method in apex from where we can update the contact.
– After creating the above method lets update our Component First then we can make some small changes in JS:
– Now it’s time to modify our JS controller of Component.
The last thing we have to do is in ou datatable call this new function (“SaveUpdatedContacts”) using parameter “onsave”.
Finally, we created our first Advanced Lightning Component.
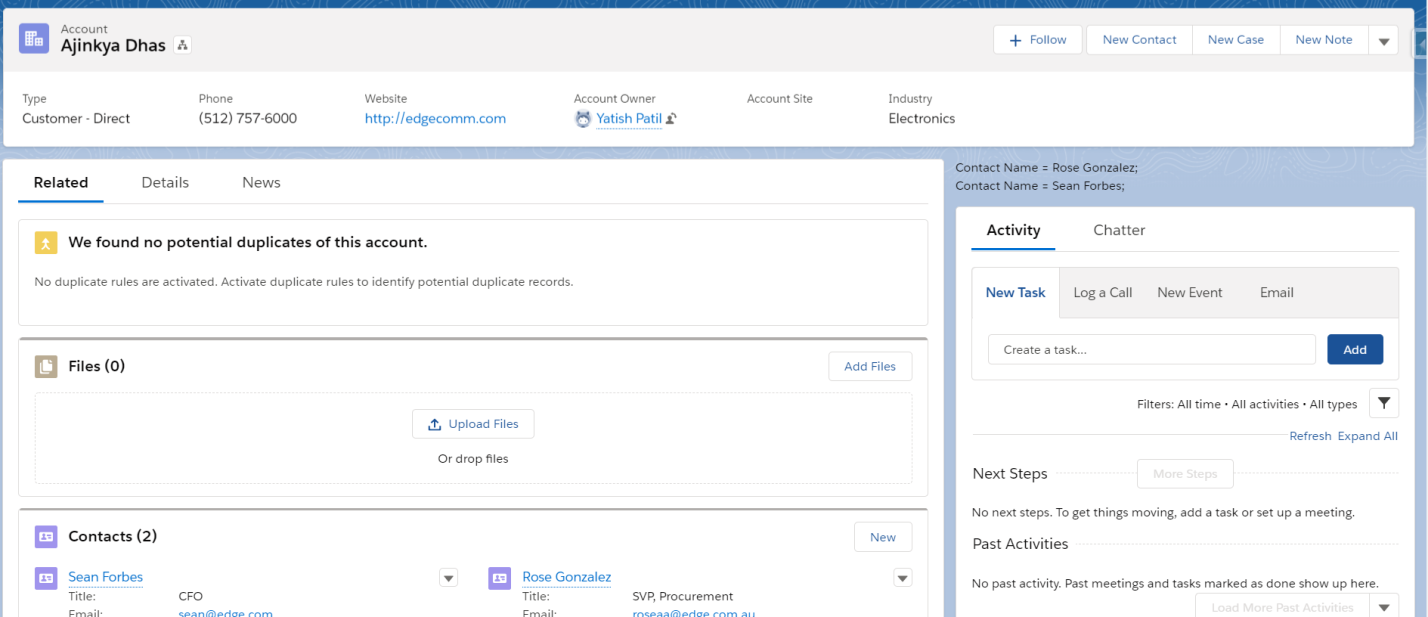
– Open any account page which has related contacts.


Leave a Comment